Step by Step Guide for JTL Shop Template

JTL Shop Template Evo already comes with all the important features. It is easily customizable, responsive and ready for SEO actions. How you can customize the template, or even use it as a basis for your own template, you can learn here.

Customize JTL Shop 4 Template

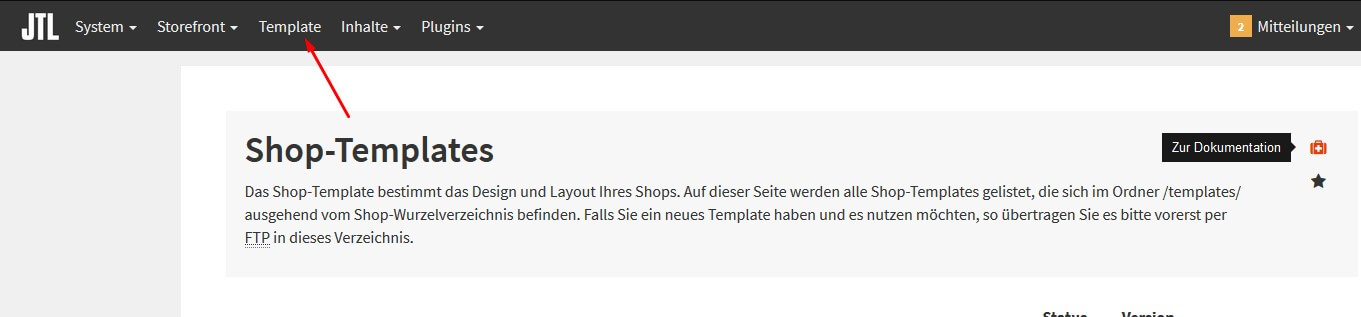
To make rather simple changes at first, log into your JTL store backend and click on “Template” there.

JTL Shop Backend Template

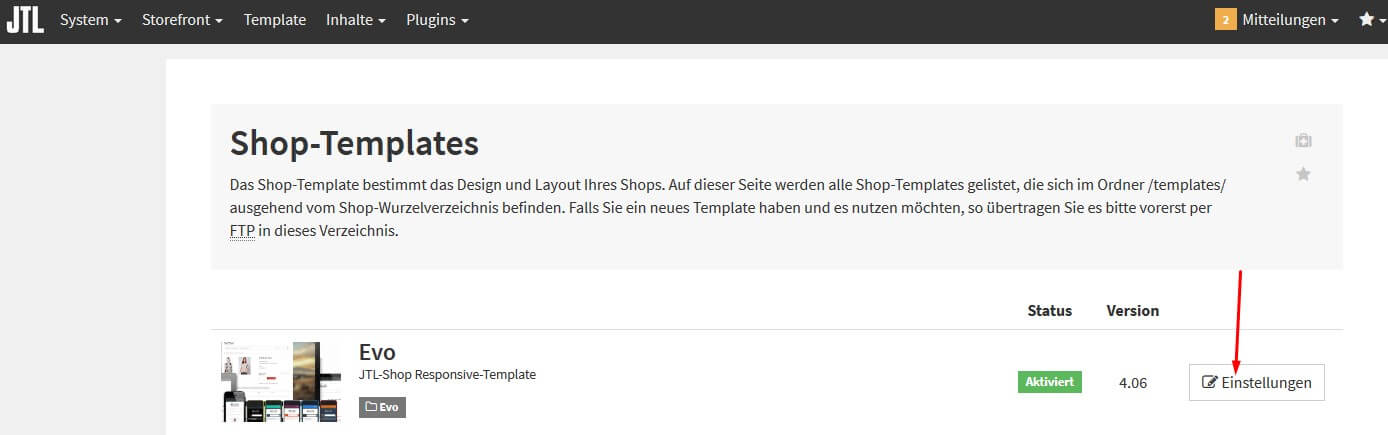
Then click on “Settings” next to the template.

JTL store settings button

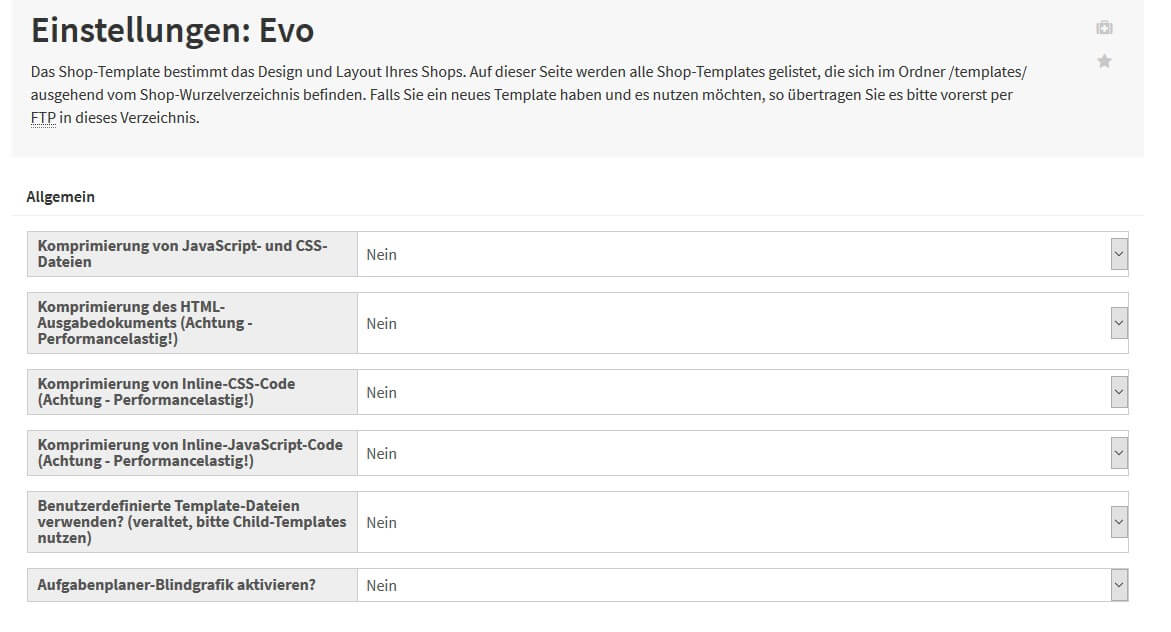
First of all, you can set general options for the store behavior, which, among other things, control the build speed of your store. If you use the store on your own server, try which settings work better than others. The web page is sometimes transferred faster, but the load on the server is increased. If your store is hosted at JTL, the performance is automatically adjusted and should always fit.

JTL Shop EVO Settings

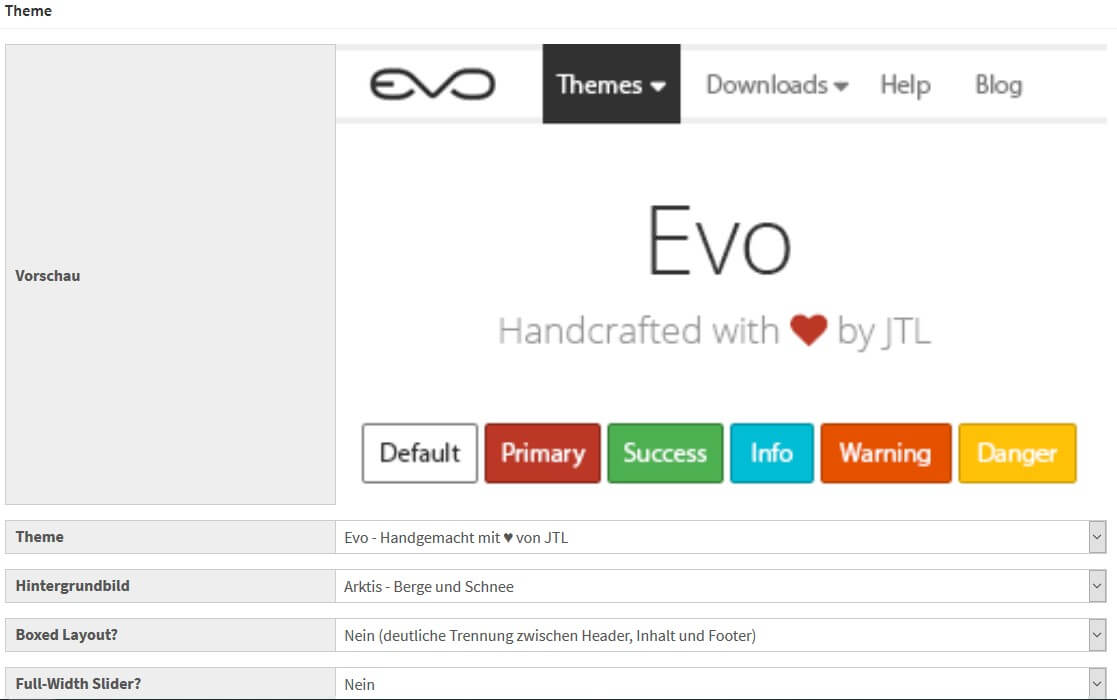
Now follow the design settings, which you can customize to your needs. In the upper area you will see a preview of the theme and the menu. Under it you have several options to customize the look of your store. You can choose from several variants of the default theme. Look at them at your leisure, maybe there is already something suitable. Pre-made background images are also available for selection.

JTL Shop EVO Theme Settings

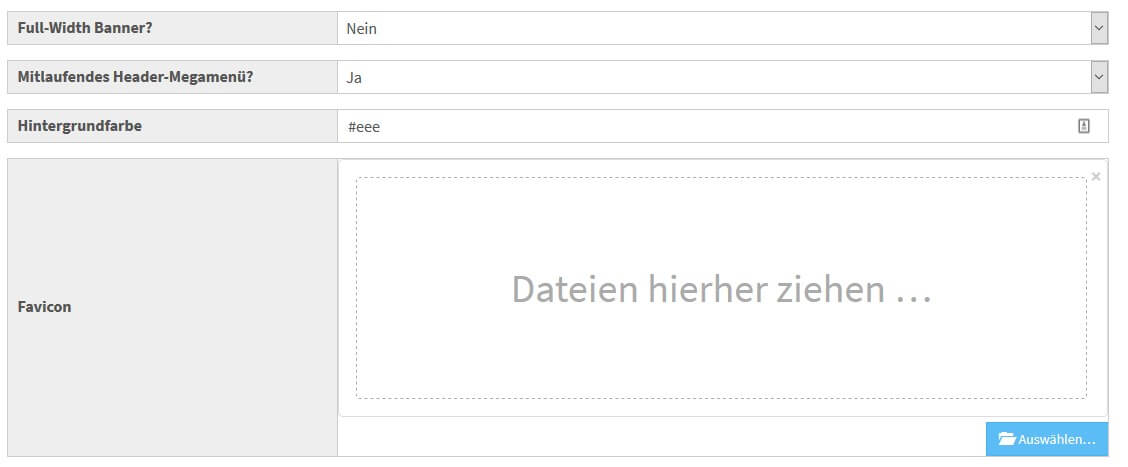
In the other settings you can specify whether you want to display a banner across the entire width of the screen, the menu should also be displayed when the visitor scrolls down and specify a background color in HTML code. You can also specify a favicon. This is the small icon in the browser that appears when you go to your store. Also, it is used when someone saves the page to their favorites.

JTL Shop Favicon

The default here is the JTL logo, but you should adapt this to your company.

JTL store backend EVO settings

The other settings control the behavior of the JTL store, but do not further adjust the colors, etc.

JTL Shop EVO Settings

At the bottom you will find the option to link to your social media accounts. If you don’t have any yet, you should create some. Find out how to use them properly in our tips for successful community management.

JTL Shop EVO Social Media

If you need more settings without editing the files directly, you can activate LiveStyler. This will allow you to customize all (!) the information that is in the CSS files without changing the files themselves. However, it makes more sense to make the changes to your own copy of the template.

JTL Shop LiveStyler

Step by step to your own JTL store template

For advanced users and designers, the option of child themes is available. With it you can create your own template based on an existing one, incl. other PHP, CSS and JavaScript files.

The idea behind this is that certain changes will be overwritten with the default values (or files) when you update the online store, or the default template, and your work will have to be redone with them. With a child template, the original files are always loaded, unless you have modified files in the child template folder yourself. These will then be loaded instead. This also protects them from updates.

The creation of a child template does not differ between versions 4 and 5 of the store, only the structure of the templates are different.

Copy the sample child template

Log in via FTP to the server where your JTL store is located. you get the data from your hosting provider. To do this, you use an FTP program, such as FileZilla. You can find basics on how to use it in the documentation.

Navigate to the subfolder “/templates/” and rename the folder “evo-child-template” to something else, like “my-new-template”. Make sure not to use umlauts, special characters or spaces.

Make changes

In your new template folder you will find the file “template.xml”, where you can find basic information about your template. You should adjust “Name”, “Author” and “URL” for yourself. The name appears in the backend of the JTL store, so you should choose an easy to distinguish name here.

Here you will also find the “Parent” specification. Here you define which template is the basis for this modified template. The default setting is fine here. If you use other templates later and want to create child templates, the respective name of the template must be entered here.

Now you can already activate your new template in the backend of the online store. Just make sure that any changes you make to files are visible in the store immediately after you save them.

You can now make the changes you want and customize all the files you want. To do this, copy the files from the default folder to the folder of your template, if it does not already exist.

If anything goes wrong, just copy the file back from the default folder to your child template folder and you can make changes again.

Let eBakery create JTL store template

If at any point nothing works, the options are too confusing, or you simply don’t have time to deal with the issue, we’ll be happy to help. As JTL experts and with top designers on board, we will create a template for you according to your wishes.

Why not arrange a no-obligation consultation right now at www.ebakery.de/kontakt/

  • 0/5
  • 0 ratings
0 ratingsX
Very bad! Bad Hmmm Oke Good!
0% 0% 0% 0% 0%

Haben Sie Fragen oder brauchen ein individuelles Angebot? Zögern Sie nicht, uns zu kontaktieren.


    eBakery requires the contact information you provide to contact you regarding our products and services. You can unsubscribe from these notifications at any time. For information on unsubscribing, as well as our privacy practices and commitment to protecting your privacy, please see our Privacy Policy.*.

    Related Posts

    Leave a Comment

    Hat dir der Artikel gefallen?

    Dann melde dich doch zu unserem Newsletter an!

    Neben unseren Blog Themen informieren wir dich darin regelmäßig zu neuen Features und Tutorials