Let’s face it, when was the last time you backed up your JTL-Wawi databases? Bad conscience? You should have! After all, the continued existence of your company depends on whether you have an up-to-date data backup in case of an emergency. And how quickly is a hard disk defective, a virus on the system or simply the entire hardware stolen by thieves. If you want to be armed against exactly that, then you should pay close attention now:
Step 1
If you have not yet installed Management Studio for SQL Server, you should do so now. You can find the download on the Microsoft download page by typing in Google the search term “Mircosoft SQL Server [Ihre Version] Express Download”. Installation is relatively simple and self-explanatory.
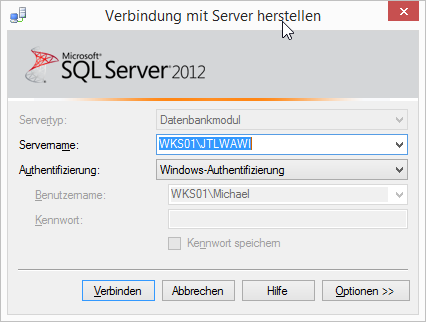
Now start Microsoft SQL Server Management Studio on the PC or server with the JTL-Wawi database. The first thing you need to do is connect to your SQL Server database. You can do this in two ways. Either with the user you installed the SQL Server instance with or with the SQL user sa and the password you assigned for this user. In the second case, you need to change the authentication from Windows authentication to SQL Server authentication.
Successfully logged in, the Management Studio welcomes you with the following window.
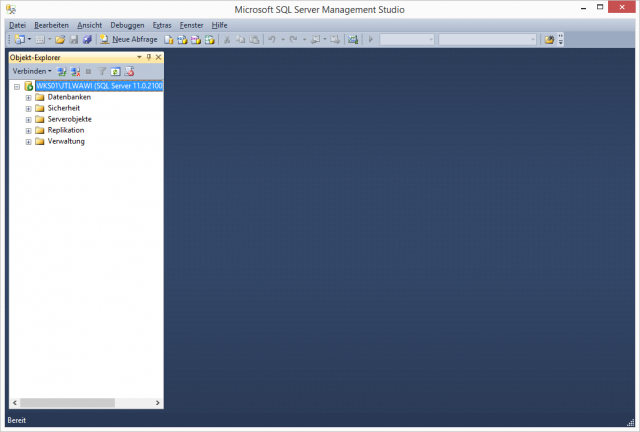
On the left side you will find the Object Explorer. Here you now expand the Databases folder by clicking on the plus sign in front of the folder name.
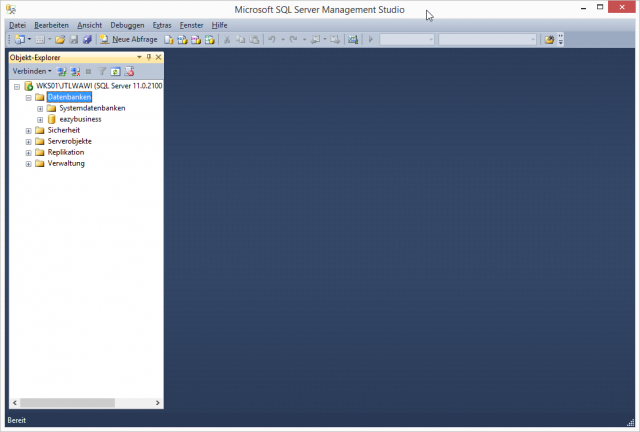
Here you can already see the eazyBusiness database. Click with the right mouse button on the database to open the corresponding context menu

In the context menu you will find the Tasks item. Click on this and then in the submenu on the entry “Save…”.
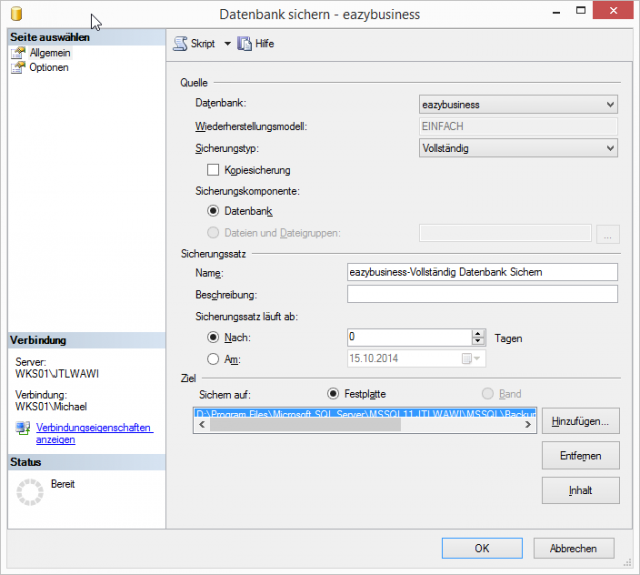
Do not be afraid! For a daily full backup of the JTL-Wawi database you can leave all parameters except one as they are. I recommend to make the backup on 2 USB sticks, which are changed daily. If you want to be absolutely sure that you have enough storage capacity from the USB flash drives, it is best to use two with 32GB storage capacity. First click the Remove button to delete the existing backup path and then click Add…
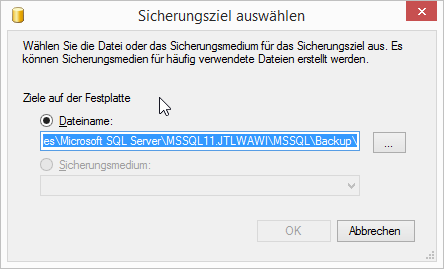
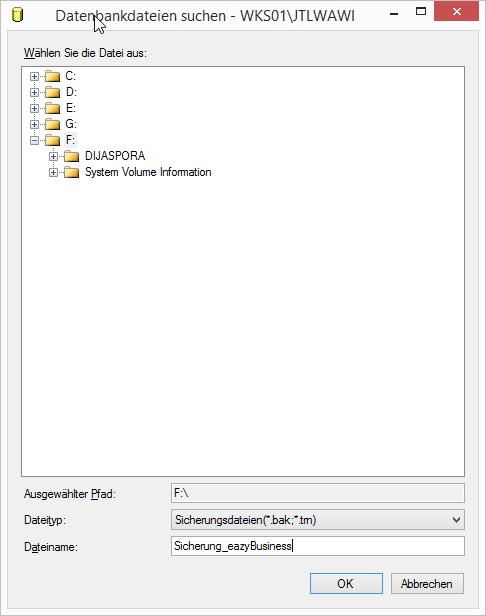
Click on the button with the 3 dots, select your USB stick in the explorer, assign a file name, e.g. “Backup_eazyBusiness” and then click OK.
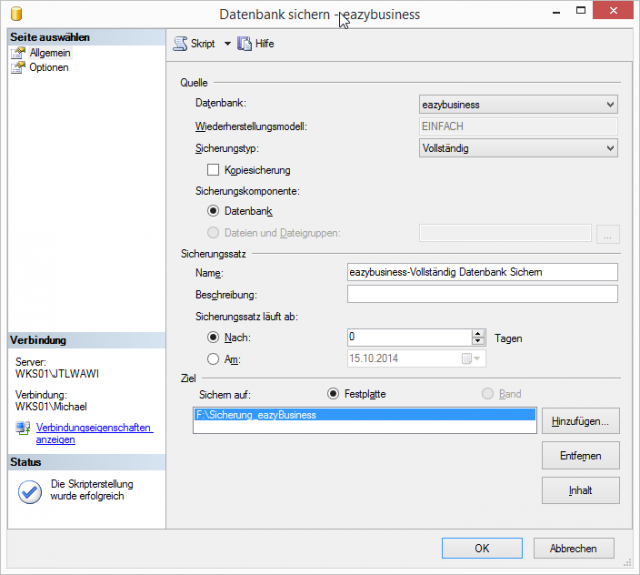
Now, before you click OK in the “Backup database – eazybusiness” window, click the “Script” button at the top and then click “Cancel”.

You must now save the now created backup script to the local hard disk. I recommend you to set up a folder Backup on the C: partition for this purpose and put the script files there. To save, click on the disk icon in the toolbar. I have given the file the filename “backup_eazybusiness.sql”.
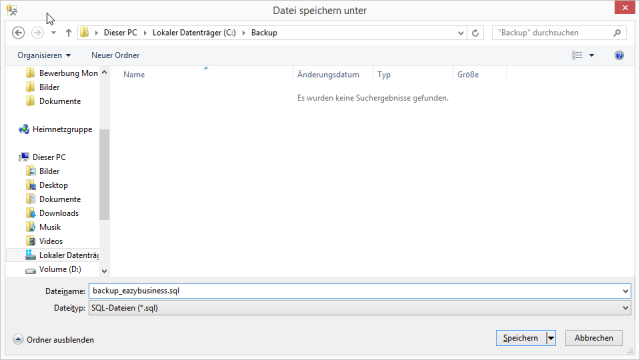
Click on Save to complete this step. You can also close SQL Server Management Studio afterwards.
Step 2
In the 2nd step, you create a CMD file that performs the actual backup job and use Windows Task Scheduler to set the time for the backup.
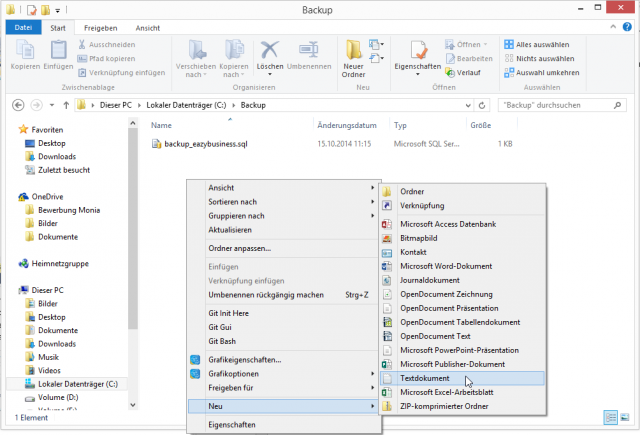
Let’s start with the CMD file. To do this, switch to the new Backup folder in Explorer and right-click below the “backup_eazybusiness.sql” file. In the context menu that opens, click New at the bottom and then Text Document.
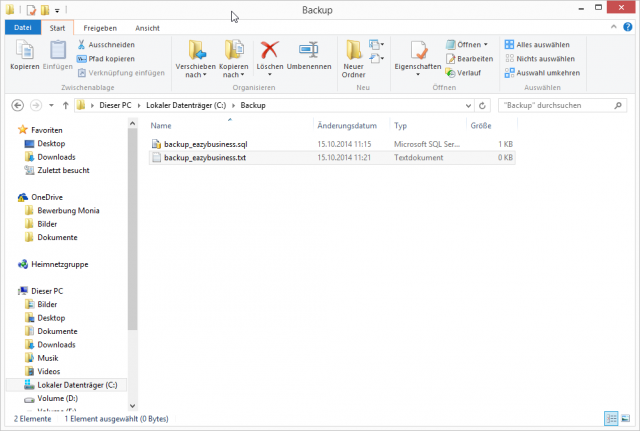
Give the file the filename “backup_eazybusiness.txt”.
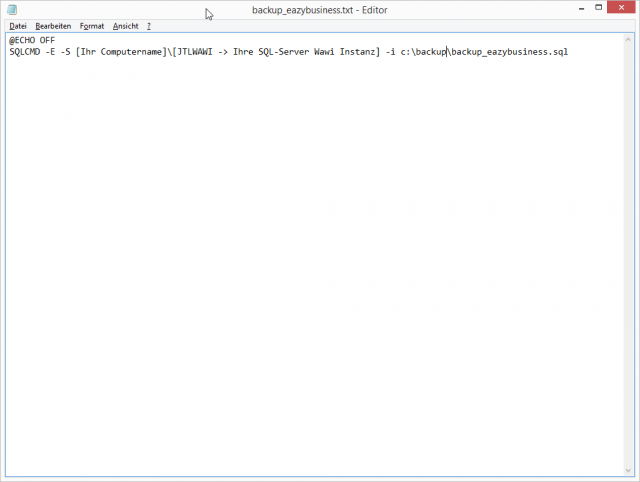
Open the text file “backup_eazybusiness.txt” with a double click. And enter the following two lines into the file:
@ECHO OFF
SQLCMD -E -S [Ihr Computername][JTLWAWI -> Ihre SQL-Server Wawi Instanz] -i c:backupbackup_eazybusiness.sql
You must replace the values in the square brackets with your personal values, which might look something like this:
@ECHO OFF
SQLCMD -E -S WKS01JTLWAWI-I c:backupbackup_eazybusiness.sql
Explanation:
SQLCMD – This small tool is installed with the SQL server
-E – command line parameters for the trusted connection
– – command line parameters for the server and instance to be backed up
-i – command line parameter for the script used to save the instance.
Simple or ? ;).
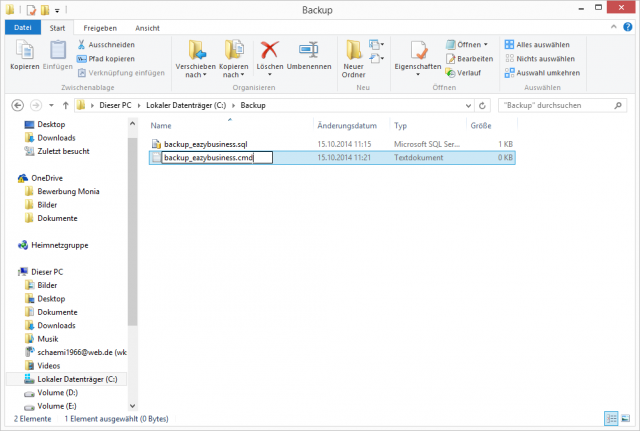
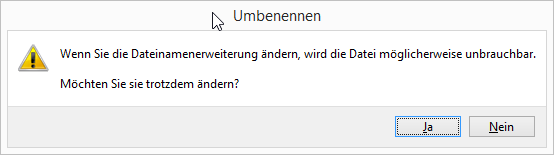
Save the file and close the text editor. Then you can rename the file in the Backup folder to “backup_eazybusiness.cmd”.
You can confirm the following message window with “Yes”.
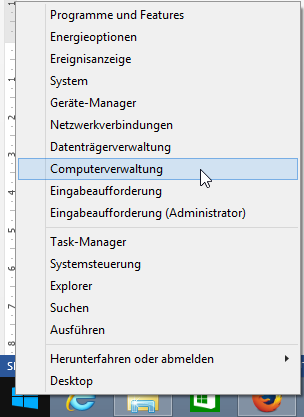
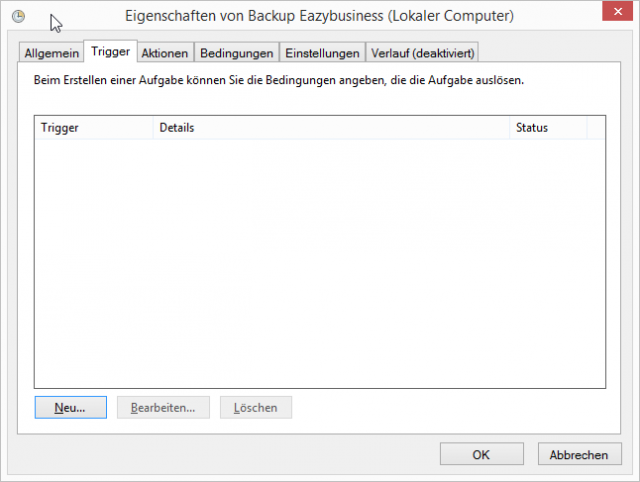
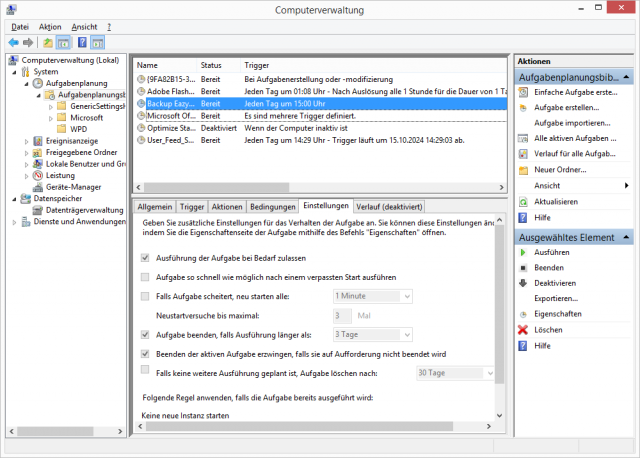
Now our CMD file only has to be executed every day at a certain time. To do this, right-click the Windows icon at the bottom left and open Computer Management.
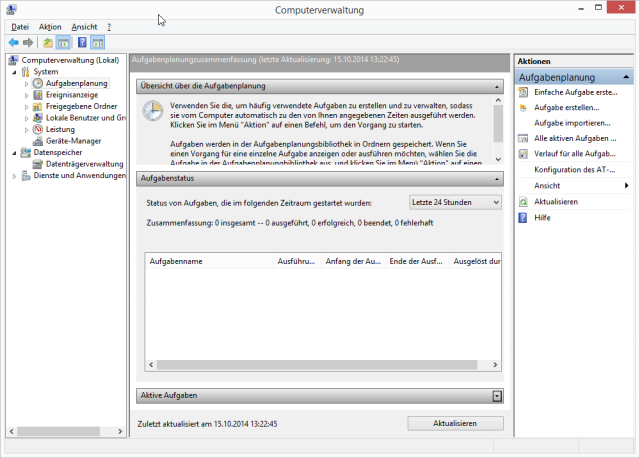
In Computer Management, first click on Task Scheduling under System on the left, and then click on “Create Task…” under Actions on the right.
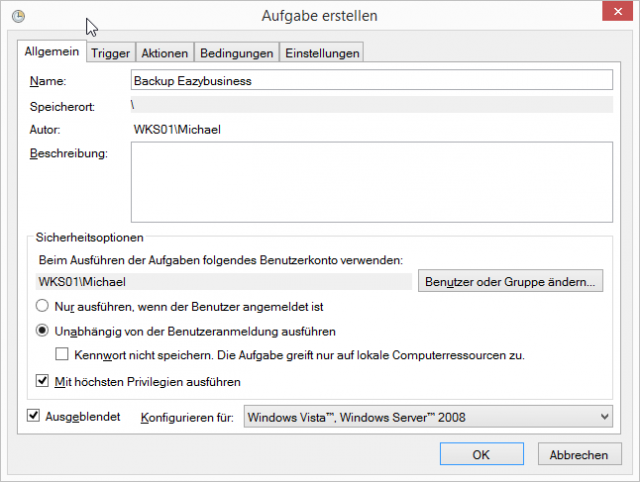
In the Create Task window, in the General tab, assign a name for the task, e.g. Backup Eazybusiness. Under Security Options, select “Run independently of user login and check the box in front of “Run with highest privileges”.
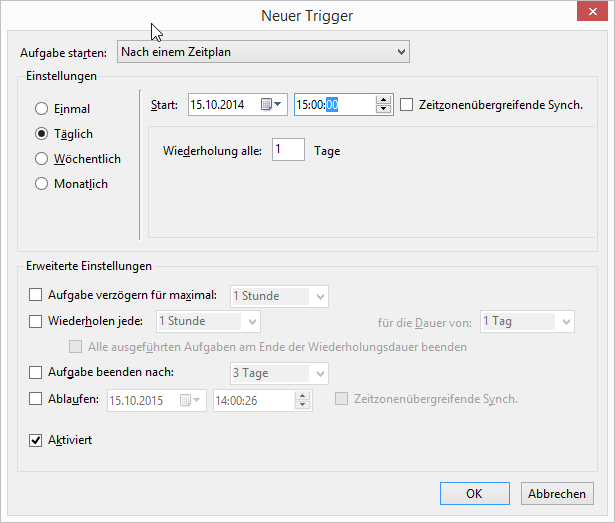
Then switch to the “Trigger” tab and click the “New…” button here.
In the “New trigger” window, select daily and set a time for the task to start, here 15:00. After that you can click the “OK” button directly.
Then switch to the “Actions” tab and click the “New…” button here.
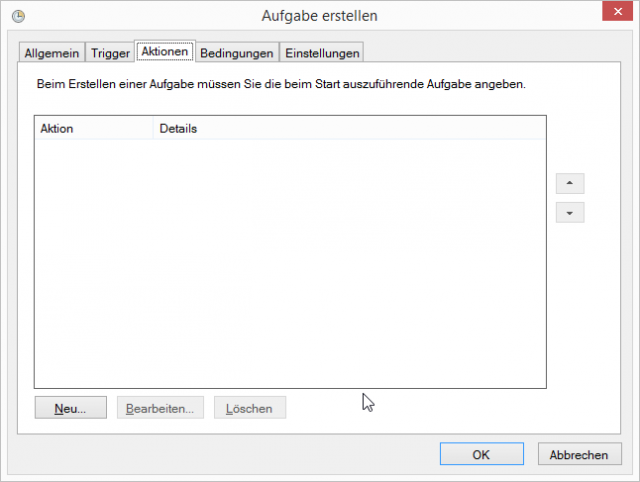
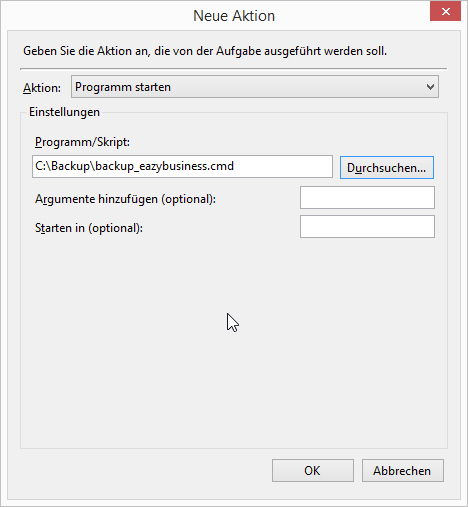
In the New Action window click the Browse button under Program/Script and select the backup_eazybusiness.cmd file in the Backup folder. Then you can click OK 2 times.
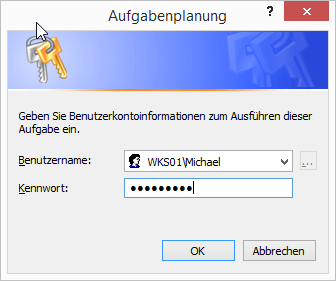
Now you have to enter your password and confirm with OK.
Okay, that’s about it. From now on, every day at exactly 15:00 the database will be backed up to the USB stick. Have fun rebuilding….
If you still have questions or need help in any other way, just contact us!