JTL-Wawi is a merchandise management system designed for online mail order business. The connection of the JTL store to the Wawi belongs to the elementary tasks to put articles online and orders from the store to the Wawi. The ideal store system for JTL-Wawi is of course JTL-Shop 3. But there are also connectors for XT:Commerce, OSCommerce, Modified eCommerce and VirtueMart. It should be noted here that not all functions are supported during store matching(https://wiki.jtl-software.de/index.php?title=Kategorie:JTL-Wawi:Webshop#Connectoren). For demonstration and training purposes I have created a sample store at https://jtlshop3.schaefer-it-consultant.de posted online. Here I show how I connected this store to my training environment.
Set up webshop settings
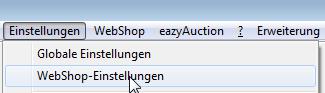
We get to the webshop settings via the menu item Settings → Webshop Settings
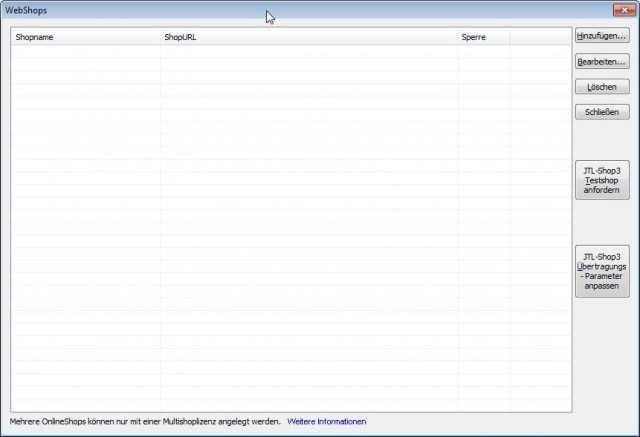
After the initial installation, of course, there is no store here yet, so we click the “Add...” button in the top right corner of the WebShops window.
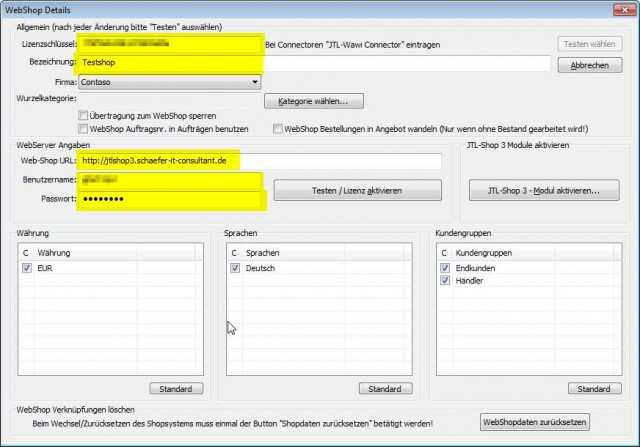
To set up store matching we need the following information:
- the JTL Shop3 license key
- the webshop URL
- the sync user with password
We enter this information in the appropriate places in the Webshop Details window. The corresponding input windows are marked in yellow here.
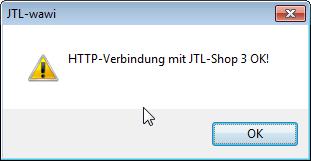
After that we click on the button “Test / Activate license” and as a result we should get the message “HTTP connection with JTL-Shop 3 OK!“. You can now confirm this message by clicking the “OK” button.
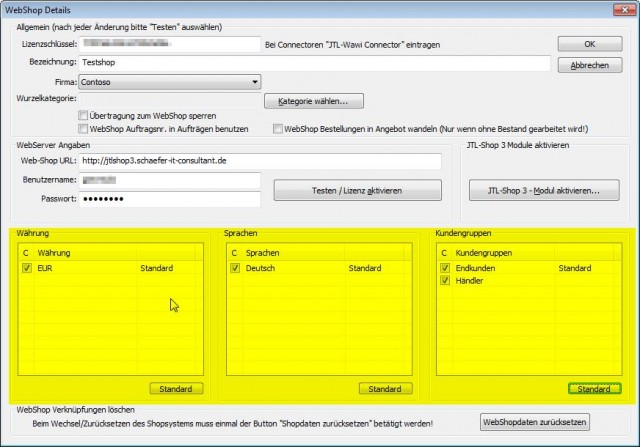
Now the standards for currency, languages and customer groups have to be defined – marked here in yellow. Mark the respective standard worth with a click and then still click on the button “Standard”. After that, the value Standard should appear behind the designation.
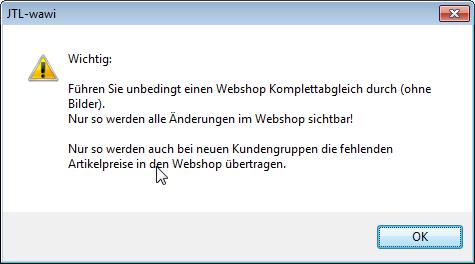
Now we can close the Webshop Details window by clicking the “OK” button. Read the message carefully and confirm it by clicking the “OK” button. Afterwards, you should definitely perform a webshop complete adjustment (without images) so that all changes are applied.
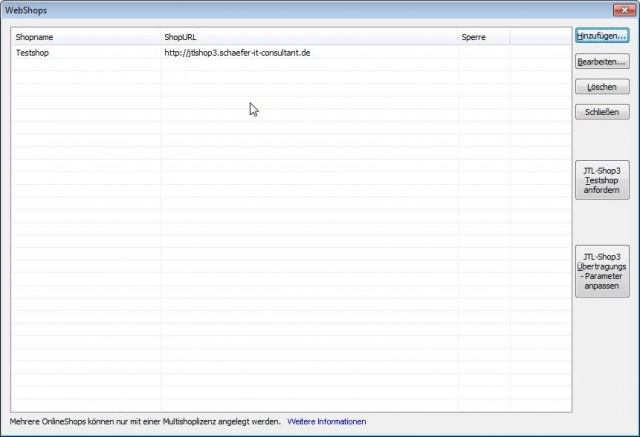
At the end you will see in the Webshops window your just created new JTL store.