![]()
Own fields in JTL – individualization of JTL Wawi
In a nutshell…
- Custom fields in JTL Wawi offer the possibility to extend the properties of an item or category
- They have the same properties as regular fields and can be used for the same tasks.
- Custom fields are useful when using the Amazon Lister, in eBay design templates, in JTL workflows and as additional input fields for the JTL store.
- A detailed step-by-step example for creating and maintaining custom fields can be found below
Own fields in the JTL Wawi
Today we would like to introduce you to a powerful feature of JTL Wawi without which many tasks would simply not be feasible. These are custom fields in JTL Wawi. Even if the unimpressive name does not immediately suggest it: with the Custom Fields you can do some very cool and useful things!
First, we would like to briefly explain why custom fields are needed in the first place. JTL Wawi comes out of the box with a myriad of features and fields that cover the customer’s needs as completely as possible. Sometimes, however, a field is missing or you would like to individualize your JTL store even more (more on this in a moment). For this purpose, Wawi offers the possibility to extend properties of an item or a category with the help of Custom Fields.
Custom fields basically have the same properties as regular fields and can be accessed in the same way. For example, they can be emailed and printed in the same way. They are a full-fledged part of the Wawi.
Areas of use for custom fields
Custom fields can be found in many areas of Wawi. Some of the most used functions are:
- Individual but standardized product descriptions in the JTL store by providing the item details with additional input fields
- More flexibility in the creation of
JTL workflows
by using custom fields as workflow conditions - More freedom and individuality in designing eBay design templates by maintaining custom fields as specific properties
- Clean separation between product and offer by creating and maintaining data fields for common Amazon item details at item level
- Accessing the custom fields via JTL Ant allows us to easily and quickly maintain the custom fields using the import and export function
Especially the last point is important here. Those who sell on Amazon may have already noticed that JTL does not provide input fields for a large part of the item features possible by Amazon. Thus, custom fields are currently the only way to maintain certain details in a clear manner from the Wawi at the item level.
How it works using the Amazon example
In the following, we would like to outline the procedure for creating and maintaining custom fields using a simple case. Here we refer back to our Amazon example from the previous section. One of the most important item properties on Amazon are attributes, also known as bullet points:
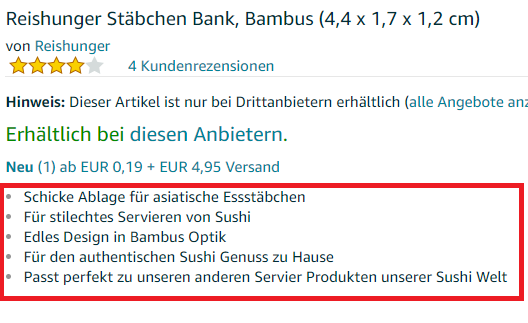
By default, no fields are stored for the Amazon attributes in the Wawi. So if we want to maintain the attributes at the item level, we have to do it with Custom Fields.
1) Creation of custom fields
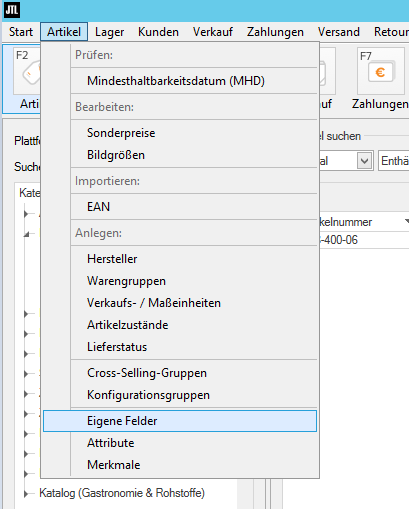
The first step is to define custom fields. To do this, we click in the Wawi top left menu on Article > Custom Fields.
A window opens in which we can manage our own fields. In the upper left corner of the area we can switch between custom fields for articles and categories. Depending on the selection, the window on the left displays the associated Custom Fields groups for the item level or category level. All custom fields are assigned to exactly one group.
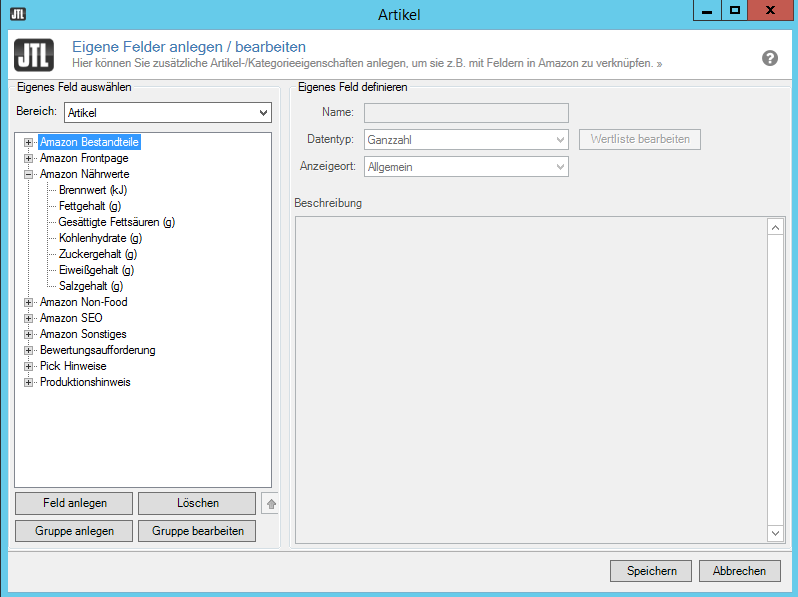
We can see in the example that some groups with custom fields for the article area have already been created. “Amazon Nutritional Values” is the group and “Calorific Value” etc. is a separate field. Here we can move, delete, edit or create new custom fields within the groups as well as the groups themselves in their position. The position decides how the groups and custom fields will be displayed later on the item level.
However, we now want to create our “bullet points” for Amazon and to do this we first click on Create Group.
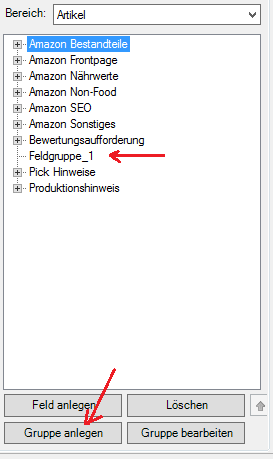
A new group will be created. We select them and click Edit Group.
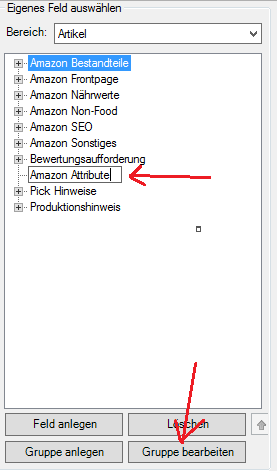
We now assign a meaningful name like “Amazon Attributes” and confirm with the Enter key. Then we select our newly created group and click Create Field. We see how a new field is created and a new area opens on the right with properties of the Custom Field.
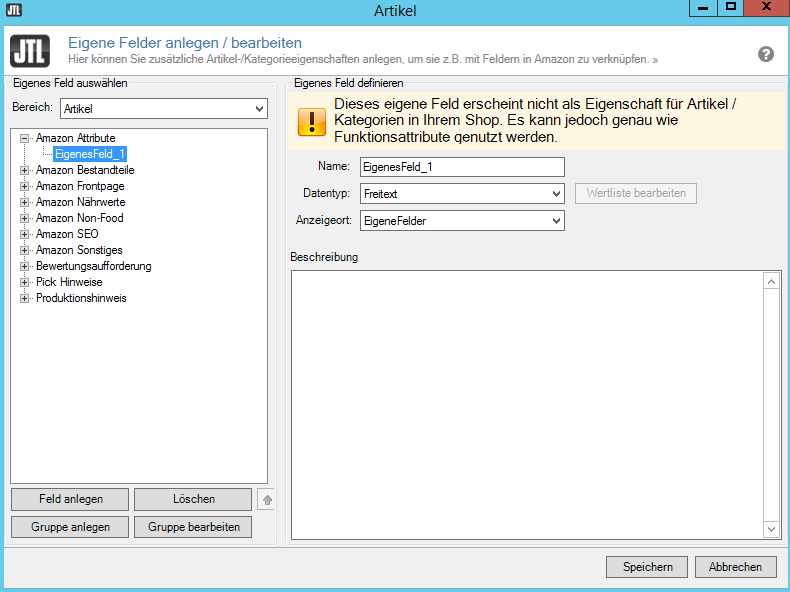
The name applies to the assignment of the Own field in the system. Thus, a unique name that has not yet been assigned should be chosen.
The data type determines the type of input we can make later. JTL currently offers 12 different types. Each type has its advantages and disadvantages.
- Integer: Only one integer can be selected at a time by arrow keys or by input.
- Floating point number: Like integer, but with the possibility to specify four decimal places.
- Free text: Provides a small window and a possibility to deposit HTML code.
- Checkbox: Creates a checkbox to select and deselect.
- Value list: Creates a dropdown between values stored in the value list.
- URL: A text field with the possibility to enter a URL.
- E-mail: A text field with the possibility of an e-mail input.
- Phone number: A text field with the possibility of entering a phone number.
- CountryISO: A predefined value list with all countries and their associated ISO codes.
- Price: Possibility to store a floating point number.
- Date: possibility to select a date from a calendar.
- Short text: A text field with the possibility of a text input.
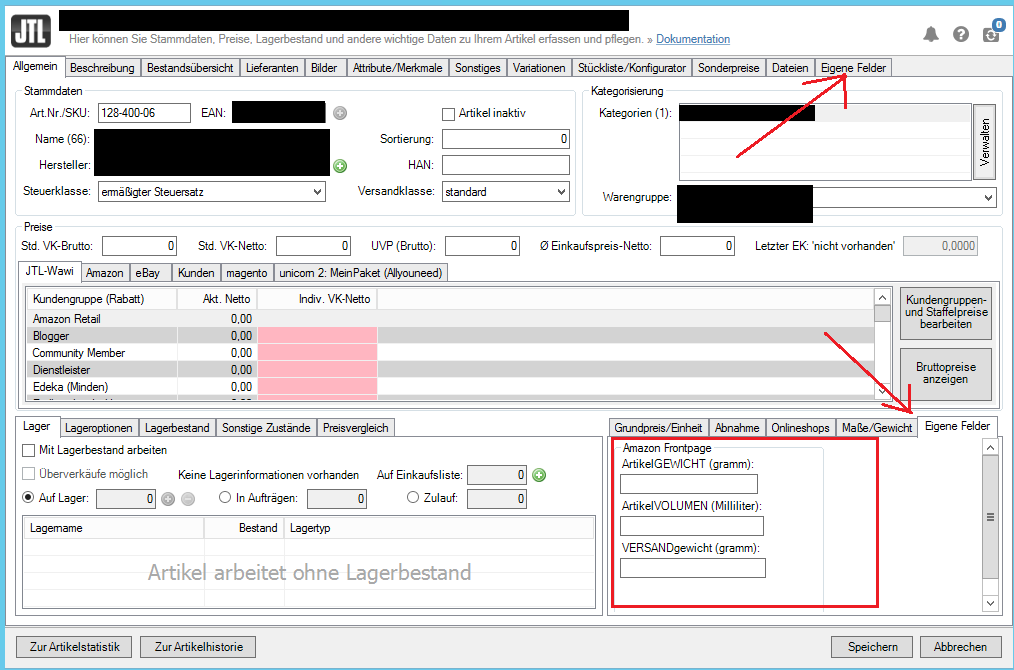
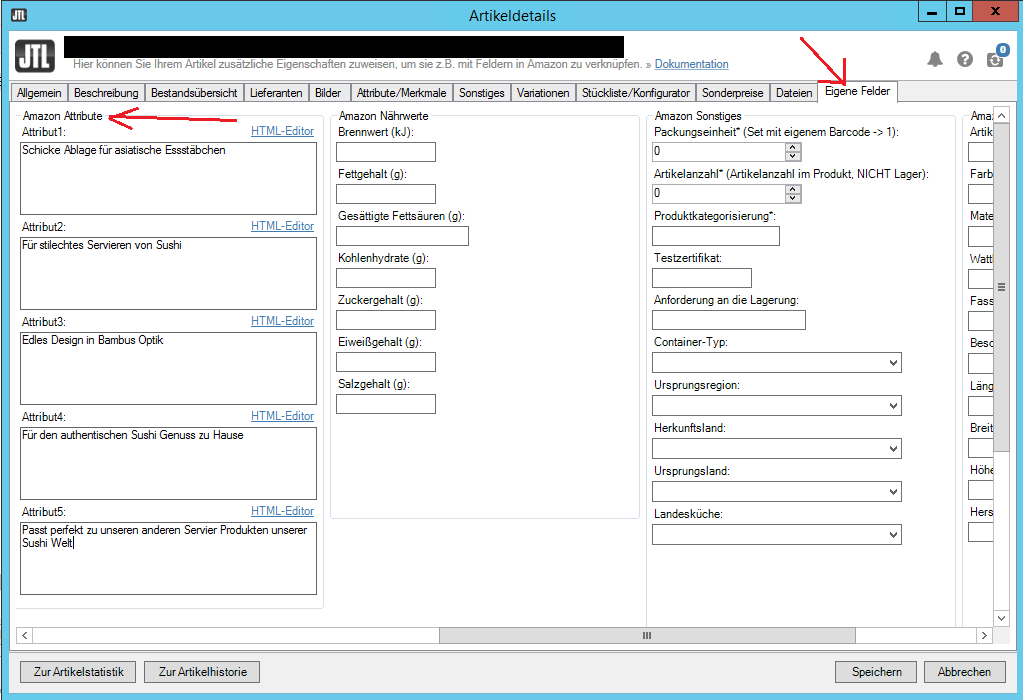
There are 2 options for the display location. We can display Custom Fields either in the General tab at the item level (see the image below) or in a separate Custom Fields tab (more on how this is displayed in a moment). However, the function of the custom fields always remains the same. The display in the General tab only has the advantage that we can maintain the data on the “home page” of the article and thus possibly save time. By the way, at the category level the display of Own Fields is divided analogously.
The description only serves as information what should happen with this field in case we forget it.
We decide to call only our own field Attribute1 and choose as data type Free Text, because our attributes should contain a longer text. As a display location we choose OwnFields. This selection will cause this field to appear later in the Custom Fields tab on the far right at item level (see image above).
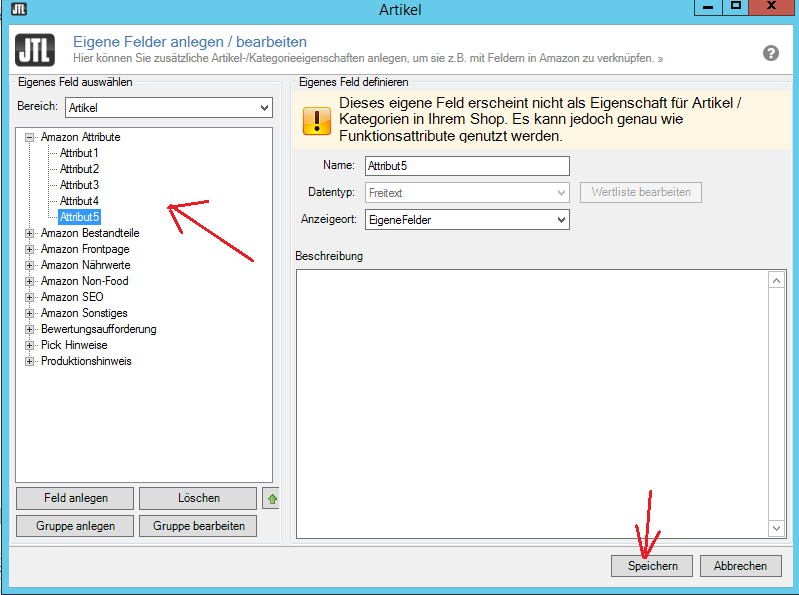
We now create 4 more Custom Fields, name them accordingly and finally click Save. By the way, assigned data types cannot be changed after saving.
2) Own fields maintenance
We now switch to the article overview of an article that we want to list on Amazon and select the Custom Fields tab there. There we can already see our created group Amazon Attributes and the custom fields Attribute1 to Attribute5. We now store the desired values for the “Bullet Points” and click on Save.
Once we have filled in all the necessary and desired fields for Amazon in this way, we can now link the existing Amazon product categories in the Amazon Lister with the Own fields. A detailed treatment of the Amazon Lister is beyond the scope of this article and will be explained in a separate article: https://ebakery.de/amazon-lister-einfuehrung/. At this point we would like to show only the principle of how custom fields can be linked.
Let’s assume we are already in the Amazon Lister. To assign the value of a Custom Field to an Amazon feature, we click on the small red “chain” next to the feature.
![]()
A window opens where we can link the characteristic with a fixed value or with an item property. We click the latter and navigate to Article > Custom Fields > Amazon_Attributes > Attribute1. If we now click on Spokes, the value of the Custom Field will be linked to the Amazon Item Feature.

Linked fields can be recognized by their yellow color. The advantage of this procedure is that the linking of the item characteristic only has to be carried out once per Amazon category. Each new product listed with the Amazon Lister is automatically assigned the values stored at item level in the offer creation.
Conclusion
So we see, custom fields have a high practical relevance and play an important role in the Wawi ecosystem. However, they only unfold their full power in combination with the other JTL-Wawi tools. Especially when listing on Amazon, they are practically indispensable. However, they can also add value for eBay design templates or in our own JTL store by maintaining item features tailored to our business field. Customization is king – and the JTL software allows us to realize this with our online presence.
You can find more information about custom fields with an introduction video and further examples in the JTL Onlineguide: https://guide.jtl-software.de/Eigene_Felder_in_JTL-Wawi_anlegen.