JTL-Wawi: Create merchandise groups
Store operators who sell different types of goods can use merchandise groups to simplify many processes considerably, for example, to make joint changes to items, to obtain better statistical evaluations or to provide all goods from a particular group with uniform attributes.
Update: This post from 04.06.2013 was updated on 24.05.2023.
An example would be an online store that sells fitness watches and dietary supplements such as protein powder. Here you would have the product group “electronic devices” as well as “food”, which each have completely different attributes, but are sold in one and the same store. In this article we will show how to deal with two such different merchandise groups, create the groups accordingly, delete them or assign them to the store items.
Create a merchandise group in JTL
In order to create a merchandise group in JTL-Wawi, the “Create and edit merchandise groups” dialog box must be called up. This can be reached via the Article menu (F2) with a further click on “Product groups”.
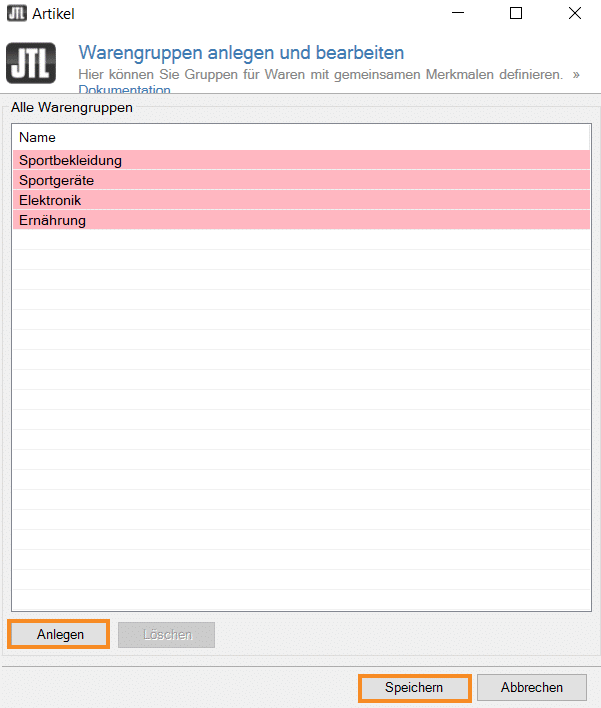
- Click on “Create” in the Material groups dialog box to add a corresponding new material group.
- If you have created a new material group, you can assign a name by double-clicking on it.
- Then click on “Save”.
Delete a merchandise group in JTL
In the same window in which the creation of the product groups can be carried out, they can also be deleted again. It is important to remember that deleting a material group is done directly and without further confirmation. Articles that were previously assigned to the corresponding material group will then no longer have one.
- Click the department you want to delete and press the “Delete” button.
- Click on “Save” to close the dialog box and confirm the deletion.
Assign articles to the corresponding material groups
In order to benefit from the default settings of the merchandise groups, the respective articles must be assigned to the merchandise groups. It is important to remember that each item can be in only one merchandise category.
By clicking on the “Articles” button you will get to the article management, where you can pick out the corresponding article to which you want to assign a product group.
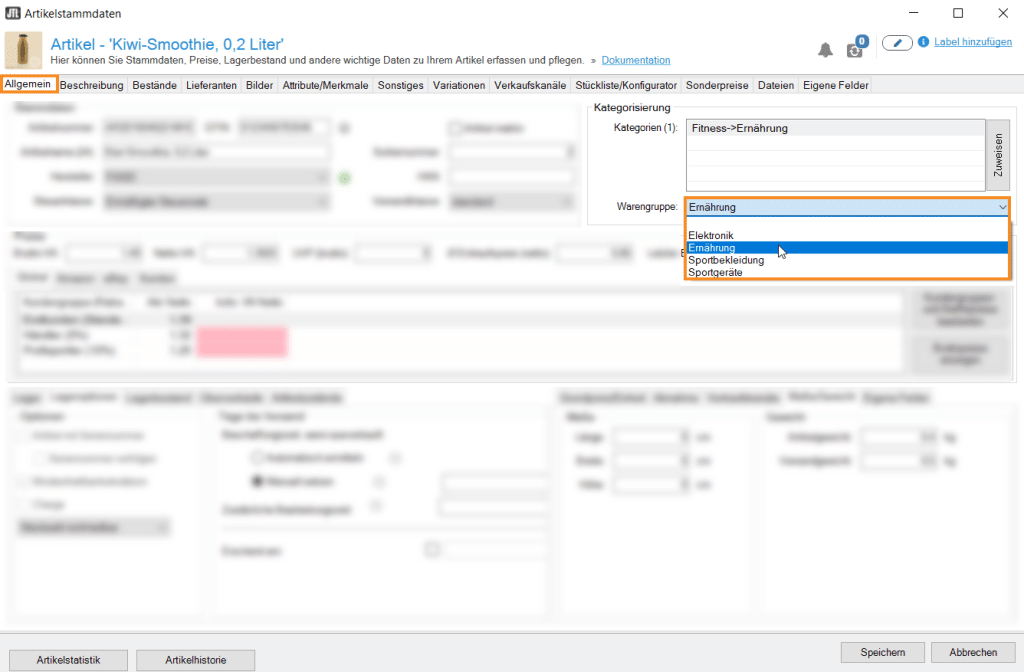
- Now open the master data of the item.
- Via the pull-down menu “Material group” the corresponding material group can be selected and assigned.
- Now you still have to save the master data.
Do you need further help setting up or using JTL-Wawi? Do you want to set up a JTL store or do you need general support? Then the JTL service partner eBakery is the right contact for you. Contact us today!