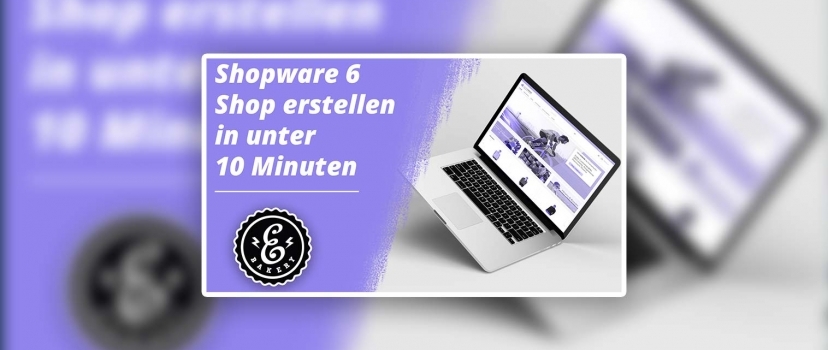
Shopware 6 Shop create in under 10 minutes

How to create your own online store

Create your own Shopware 6 store in under 10 minutes – Find out how in this Shopware tutorial. We’ll show you a tutorial on how to get started with Shopware 6 without any prior knowledge. Installation, create product, create category, create experience worlds, enter legal texts and play them out in the frontend, and integrate shipping and payment methods. We explain all this in this video.

Create Shopware 6 Shop - Check system requirements

Before we start you should check that your web server meets the necessary system requirements. Because unlike Shopify, this is not a cloud system. You can view them on the Shopware 6 page. Where you can then also download the Shopware 6 installer to unzip it in the desired directory on your system. This should have write permissions in any case. After that, you just need to call the URL of your store in the browser and you will be greeted by the Shopware 6 Installer home page.

Shopware 6 installation process

The desired language of the installation wizard is“German” in our case, but can be changed as desired. We click Next. The next step is to check the system requirements, which are completely fulfilled in our case, so we can continue with Next. It is best to read the terms and conditions and if you agree with them, agree and proceed. In the fourth step you enter the database username and password, as well as the database name itself. Then start the installation. This can take a few minutes, during which you can think about the name of your store, which email address you want to use and what your login name and login password for your Shopware 6 backend should be. These data are needed in the next step, which you then enter there. This completes the installation.

Shopware 6 Create Shop - Create Product

We have now registered with us in the store backend and want to create our first product. To do this, go to Catalogs and Products in the left column. We already have our sample products here, but we want to create a new one as an example. To do this, click on Create product. We name it like we already do in our Shopify store, making it clear that it’s a sneaker. Similar to Shopify, we also have a full-fledged editor here, so we can enhance the description visually but also SEO-wise without having to know HTML. We see here that the product is switched active by default, so we don’t have to change anything. We subsequently enter a price and, if applicable, a strike price to demonstrate that this item has been reduced. We indicate the stock and the delivery time. Everything else is optional. If you want to see a detailed product creation in Shopware 6, you can do that in the blog article. We have not yet created a category, so we cannot assign one at this point, but we will do so below. But media is what we want to include, and that’s our product images. As also mentioned in the Shopify video, pay attention to the search engine optimization of the images, i.e. compression, spelling of the image names and integration of the alt text.
We can also enter our meta data here, but we don’t have a preview view compared to Shopify. Therefore, to be on the safe side and make sure that your meta title or meta description is not truncated, we recommend the Sistrix Snippet Generator. Finally, just enter the dimensions & packaging info in this section. To e.g. sales or packaging units in more detail, they must first be created.

Shopware 6 Worlds of Experience

Next, we want to create an experience for our “Shoes” category that we are yet to create. You can find them in the content section. I’ll just explain in advance what you can change in the theme settings.
Here you can find a currently active theme. With one click on it you can customize the color scheme of your theme, i.e. integrate your CI colors, determine the fonts used and replace your logo and favicon.
You can find a detailed description of this in our “Customize Shopware 6 Theme” blog. We now prefer to create a world of experience, so we will go into it in the content section. Create a new layout, decide on a full-width category page and already find a suitable standard layout. As demonstrated in our Shopware 6 Worlds of Experience video, all necessary changes can be made here in the right column. Thus, we can drag a text block into the main field once and name it after our category. But not only text elements can be integrated, also videos, images, sidebars, forms and more. As before, you are limited only by your creativity. We save this layout and do not associate it with any category yet, so just click “apply”.

Shopware 6 Create Category

We are now catching up and creating a category. For this goes to catalogs and categories. This catalog is the one we want to use as it is already linked to our system header settings, so it will be played out in the frontend as well. However, if you want to change this, you have to go to the settings for your sales channel by clicking on it at the bottom left and changing the entry point for the main navigation here.
Now back to our category creation. So we want to add a subcategory to this catalog called Shoes, which in turn contains a subcategory called Sneakers. It is important that this is switched active. We assign it to our just created category layout and add our created product here. Save at the end. Now we have created our first purchasable item, sorted it into a category with our desired layout and now check if it can be ordered.

Create Shopware 6 Shop - Perform test order

Accordingly, we go to the category Sneakers and can put our item directly into the shopping cart. We continue to the checkout, have already entered our customer data here in advance and see that certain payment methods such as e.g. the cash on delivery and also standard shipping methods are available from home. Now let’s place our test order and look at it in the backend. For this purpose, there is a separate category here called“Orders” and we can already see that the test order was successful. This can now be edited by you. If you now want to add more payment methods or shipping methods, I’ll show you where you can do that.

Add shipping and payment methods in Shopware 6 backend

To do this, go to the settings in the store submenu. Here you have both the shipping and payment methods settings.
You can learn how to create them in our “Shopware 6 shipping and payment methods” blog.
You are now missing only one point, because you do not want to be warned – so it is called before the live gear legal texts integrate and check.

Create Shopware 6 Shop - Integrate legal texts and play them out in the footer

Unfortunately, we cannot give legal advice and thus do not do so, but merely provide information. You can generate legal texts at Trusted Shops or the Händlerbund.
Now, when you have your necessary legal texts, go back into the experience world configuration. Here, the necessary layouts for the legal texts are already available by default. We go accordingly times bspw. into the imprint and would then insert the generated imprint here. Save at the end.
Now we go into the categories and create a new catalog. In this we create the subcategory Footer and in it the subcategory Imprint. Both must be switched active. Now we assign the just configured layout in the category imprint and save.
We’ll go into our sales channel settings and set the correct entry point for the footer navigation here.
Save again and then check in the frontend.

Create Shopware 6 Shop - Integrate legal texts and play them out in the footer

Now you know how to create your own Shopware 6 store in under 10 minutes. If you have any further questions about Shopware 6, we at eBakery are happy to help and support you as a Shopware agency.

  • 0/5
  • 0 ratings
0 ratingsX
Very bad! Bad Hmmm Oke Good!
0% 0% 0% 0% 0%

Haben Sie Fragen oder brauchen ein individuelles Angebot? Zögern Sie nicht, uns zu kontaktieren.


    eBakery requires the contact information you provide to contact you regarding our products and services. You can unsubscribe from these notifications at any time. For information on unsubscribing, as well as our privacy practices and commitment to protecting your privacy, please see our Privacy Policy.*.

    Related Posts

    Leave a Comment

    Hat dir der Artikel gefallen?

    Dann melde dich doch zu unserem Newsletter an!

    Neben unseren Blog Themen informieren wir dich darin regelmäßig zu neuen Features und Tutorials