In part 1 of my design adjustments to the JTL Shop 3 test and simulation environment, I described how the categories get to the home page. In this part, I’ll show you how I set up the slide show on the home page.
Despite the few adjustments, the template already looks much friendlier, as you can see in the screenshot below. For the whole thing I used Gimp 2.8.10, Inkscape 0.48 and Notepad++ v6.6.7. For uploading and downloading the files I use FileZilla of course. So I get to work….
Step 1 – Creating the images
As a warm-up, so to speak, I bring the images that I have previously obtained via https://www.pixelio.de into shape. So right-click the image file you want to edit in Explorer and simply click “Open with GIMP” in the context menu.
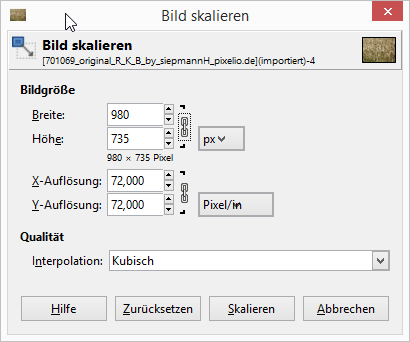
The image is a bit too big with 1280 x 960 pixels and has to be brought to a width of 980 pixels. To do this, I click on the “Image” menu item in Gimp and select the “Scale Image” command.
In the Scale Image window, under Image Size, I enter Width 980. The height is then automatically adjusted. If everything is correct I can finish the process with “Scale”.
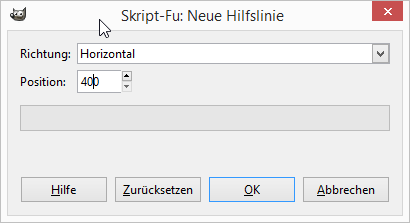
Next, I need to get the image into shape. The height of each slider should not exceed 400 pixels. So I have to cut something from the picture. For this picture I decided to use only the upper part. So I create four guides horizontally at 0 and 400 pixels. Vertical at 0 and 980 pixels. To create the guides I click in the menu on “Image -> Guides -> New Guide…”
The New Guideline window is pretty self-explanatory. With a click on OK, I complete the process.
Once I have created my guides, I can use the rectangular selection tool to select the upper area.
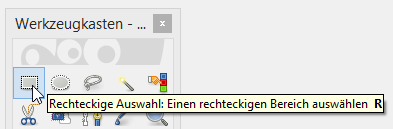
After that I only have to select the command “Crop to selection” in the menu under Image and I have brought my image to the right size.
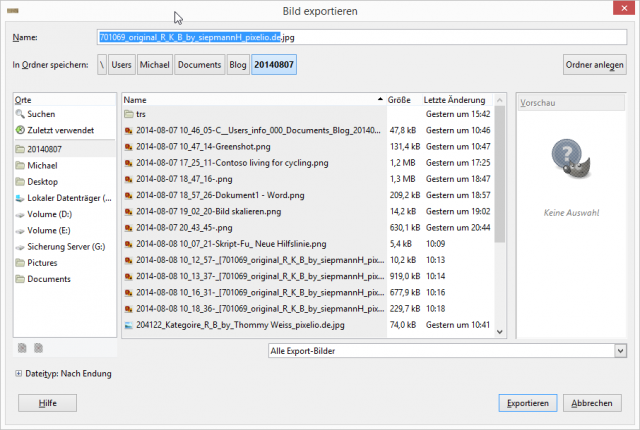
Now I only have to save the revised image via the command “Export as…” in the menu item File. Please pay attention in Gimp, with Save or Save as a file in *.xcf format is created. But I need the JPG or PNG format here.
In the Export Image window assign a file name and then finish the process by clicking the Export button.
Step 2 – Setting up the slide show
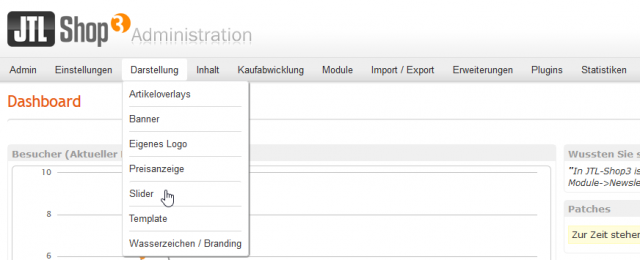
Now I have the images on my hard drive, but still no slideshow in the sample store. So now I log in to the backend of JTL Shop 3. In the backend I find the entry Slider under the menu item Appearance. And this one I click on now.
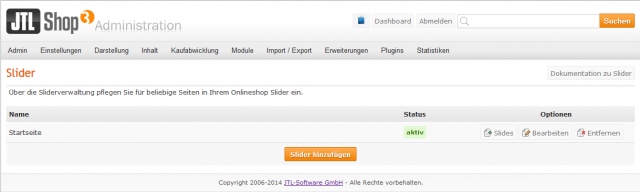
Of course, I already have an entry under Slider with the title Start Page. To add a new entry I click on the button “Add slider”.
As name for the slide show I have assigned start page and made the following settings:
| General | |
| Internal name | Homepage |
| Status | Enabled |
| Random start | No |
| Hover pause | Yes |
| Representation | |
| Navigation | View |
| Thumbnail navigation | Enabled |
| Navigation direction | View |
| Effects | Random effects disabled and fade selected |
| Theme | Light |
| Animation speed (in ms) | 500 |
| Pause time (in ms) | 3000 |
| Display options | |
| Language | All |
| Customer group | All |
| Page type | Homepage |

You can play around with the slider settings until you find the best configuration for you. Click the “Save” button to create the new slider.
From here I can add my prepared images for the slide show. To do this, I simply click on the “Slides” button on the right.
In the Slider window you can already see the two slides I added during the test. With a click on the button “Select image” I can add another image to my slide show.
Using the “Upload” button I can now upload a new image to the web server.
With a double click on the new file I add the new image to the slide show.
Unfortunately, only a very short green highlighted hint appears that an image has been selected. I now assign a title, enter a description behind the text and provide a link to the corresponding category. Clicking the “Add” button will create the new slider image.
Step 3 – Customize inc_extention.tpl
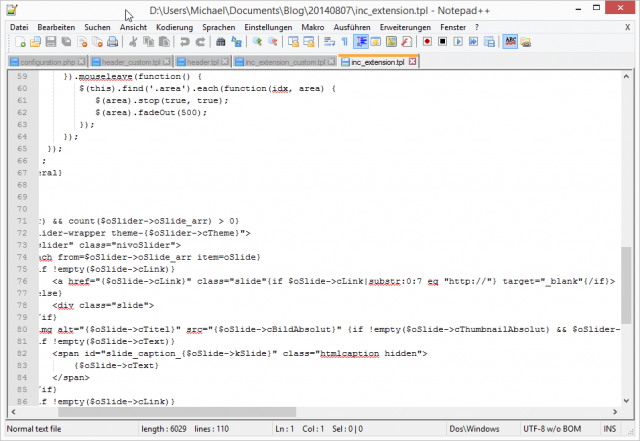
Unfortunately there is a small bug in JTL-Shop 3 here. If I click on one of the three slider images, the link stored here will open in a new window. But I don’t want it that way. That’s why I have to download the responsible inc_extension.tpl from the folder templates/JTL-Shop3-Tiny/tpl_inc to the local harddisk. I open the file in Notepad++ and find the cause in line 76. The target=”_blank” entry at the end of the line must simply be deleted here.
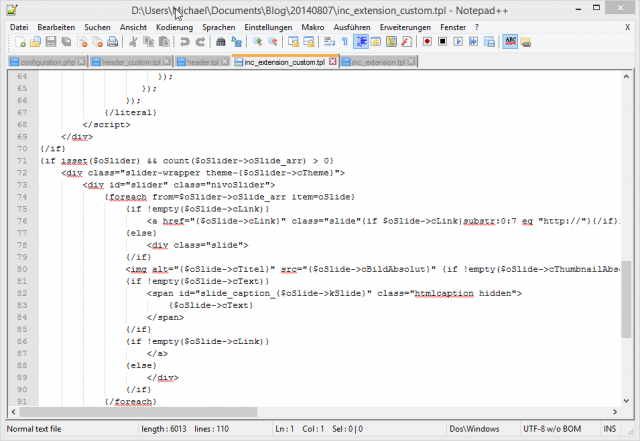
I save the revised file as inc_extension_custom.tpl and then upload it to the templates/JTL-Shop3-Tiny/tpl_inc directory. That was it.
Conclusion:
With a little technical skill and the targeted search in the JTL software forum, I very quickly had everything together that I needed for the adjustments to my JTL sample store. Have fun building your own
Michael Schäfer